Monday, 6 February 2012

trip to MNR for pre IVA checks


took a trip to the guys at mnr today for all the pre IVA checks as well as mapping,emissions, and suspension setting.
they picked up on a few minor things but were pleased with how id built it considering its my first ever build and they really liked the look of it and rear exit exhaust setup.i think its the first ever yellow caged british racing green MNR at the moment so its definately unique! hers a few pics in the workshop. as you can see,the car took a bit of punishment on the way there as the roads were wet and covered in salt. it was filthy by the time we got there!

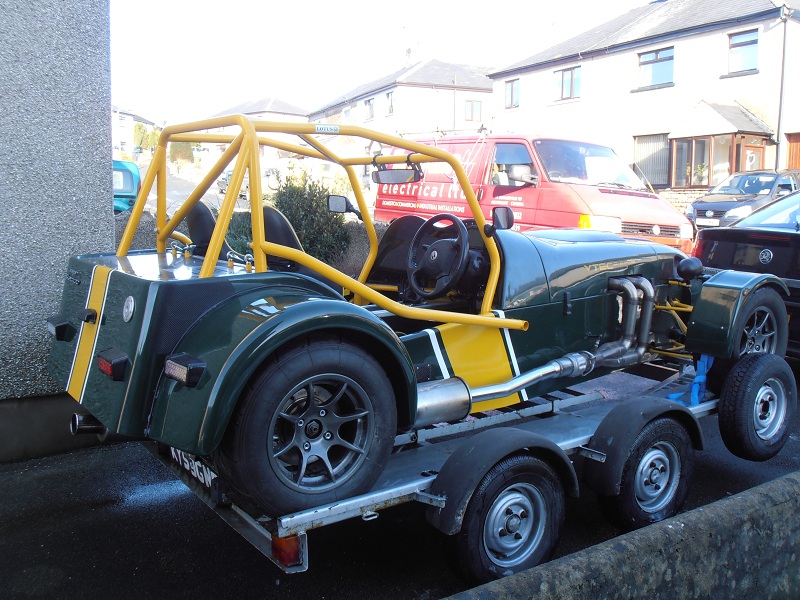
graphics done,and car loaded on trailer for sign writing


had my graphics done this week by cm signs and am really pleased with the outcome. we loaded it up o to the trailer and away we went! see what you think.

nose cone indicator wiring


i have also just iva proofed the front indicator wiring in the nose cone by fixing some cable tie bases to the inside of the nose and cable tying split tubing to protect the wiring. i will shorten the actual indicator wires when the car is iva,d as these are not iva compliant so will be getting removed!

Sunday, 5 February 2012

got my dash 2 fitted, and rad fan waring light.


finally got round to fitting my race technology dash 2 and radiator fan warning light.
the mnr scuttle is a funny shape and the dash 2 would not mount to it directly so i riveted a carbon effect sheet to the scuttle to take away some of the original scuttles double curve. this enabled me to mount my dash 2 square on,with no gaps around the edges. also put an illuminated warning for the radiator fan to stop me leaving it on.when the engine is running its very loud ands therew is no chance of hearing if the fan is on so the illuminated symbol should let me know to turn it off in case i forget!
i have also covered the pannel in edge trim to make sure its IVA ok, even though its in the exempt radius area behind the stgeering wheel

hybrid drive shafts fitted


finally got my hybrid drive shafts back from driveline, and fitted to the car. absolutely stunning job they did in making these shafts,as im using a honda s2000 differential and ford sierra rear hubs. i had 4x complete shafts (2x honda,2x sierra) and gave them measurements.the end result is spot on and they fit perfectly

brake fluid resevoir,filler unions and clutch cable done


i have bought some nice brake fluid filler unions and IVA proof hoses as my last ones were leaking from a seal. bought 2x 7/16" male to male unions to screw into wilwood cylinder and 2x adonised filler unions to screw it them, easy job and look really tidy too! and no leaks which is a bonus
akso dobne my clutch cable which i got from HEL performance.in yellow. p-clipped to chassis rails and connected to master cylinder and clutch slave

Monday, 16 January 2012

IVA booked so some more fettling of bodywork!


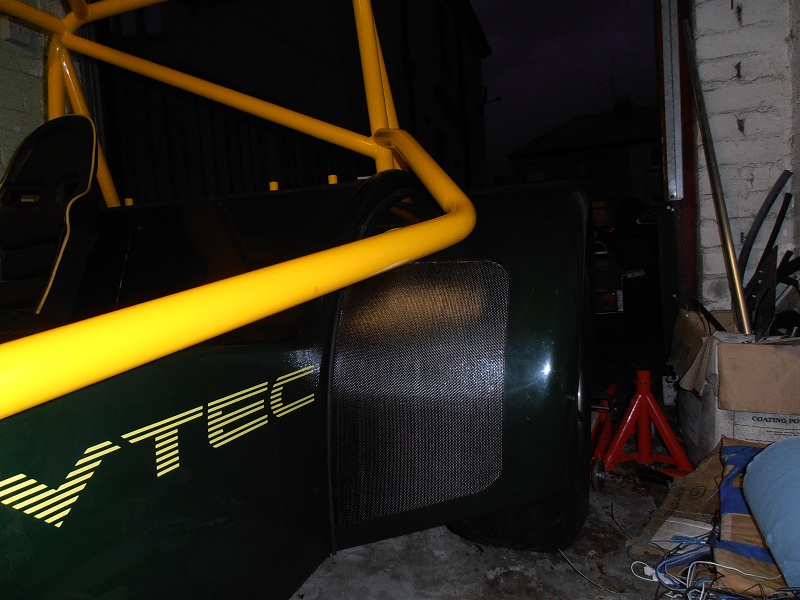
have more or less got the bodywork completely done now, its all in position,all vents are done and NACA duct vents straight into PRM intake now. all holes are drilled through bodywork,riv-nuts inerted into chassis and bolted down in position, arches securely fixed also with riv-nuts and bolts. its starting to look like the finished article now!

spoon N1 rear exit exhaust done and new LED rear lights fitted


i took my car to exhaustafix in darlington this week to have my rear exit exhaust done.they made a fantastic job of it and were very helpful and full of good ideas. i had a full spoon sports N1 system from a honda s2000 which i wanted modifying to suit my mnr. they re worked the pipework in stainless and the result is exactly what i was after.and hopefully a bit quieter than if the tailpipe was by my right ear!
i have also fitted a new set of LED rear lights which i found. all e-marked for IVA purposes and straight forward to fit to carbon pods,which are also angled to make them all vertical,again for IVA reasons. the look is just what i wanted! im slowly making progress with IVA looming

Wednesday, 28 December 2011

dash almost sorted


almost got my re made dash sorted now after buying a race technology dash 2 system instead of the s2000 clocks which were provind difficult to wire.i have got my DTA S60 PRO ecu installed and the car startds and runs sweetly. i opted for a stack analogue oil pressure guage and an aem digital AFR guage and controller, as well as the required savage switches needed for IVA

battery,header tank and fuse box final fitment


got the scuttle pannel correctly fitted and positioned, bolted the battery down to avoid it moving whilst braking or cornering, fixed the fuse box to scuttle pannel with m6 bolts and some nylon spacers to space it off from the scuttle pannel and washers and nylocs on the inside. i have also mounted the header tank to the pannel with m6 bolts and nylocs but first i put some sticky foam on theback of the mounting brackets to avoid scratching the gel coat

rear stone guards,fuel filler and fuel rollover valve done


another small job was to fit the carbonmods rear stone chip guards. these are a sticky back item which just required positioning correctly and sticking on.a fairly straight forward job compared to most..
i have also fitted an expensive red adonised fuel roll over valve from merlin motorsport to let the tank breath,but also to stop fuel from leaking in the event of a roll.
alloy fuel filler cap has also been fit to rear tub and filler hose connected to cap and tank! things are movin on slowly

carbon bootlid done


i have bought and fit a carbonmods boot pannel.i first marked out the roll cage bars and cut and permanently fixed the 2 x outer sides of the lid.i then cut a center section and drilled it in several places to enable me to put riv-nuts in the rear tub fix the carbon lid to it with m6 bolts. the final part was to bond a section of radiused edge trim to the front edge,as to make sure i dont fall foul of any radius testing during the iva test. the removeable pannel enables me to possibly fit a storage tray above the fuel tank at a later date.

iva wing mirrors fitted to cage. speed sensor mounted


i have bought some suzuki e-marked wing mirrors for the mnr. i measured them up from the drivers seat,marked positions with masking tape and drilled and tapped the cage with a 6mm tap and bolted the mirrors on.i also put some tigerseal between the mirror mounting brackets and the cage for extra grip and to stop the 2 metals rubbing together.
i also have mounted the race technology speed sensor to the mounting bracket at the front of the propshaft.all the wiring is protected by spiral conduit. i have used 1 x longer bolt on the prop so it only picks up 1 pulse per prop rotation!

Sunday, 21 August 2011

Fan temp switch,cooling hoses and car electrics complete

I have also recently bought a 32mm hose joiner with a pre welded boss in the top for the temp switch. I have fit this in to the top radiator hose and wired it according to the instructions. A quick check around of the coolant hoses was carried out,and clamps tightened where necessary.
One of the main jobs of the build was trying to incorporate the s2000 electrical components I to the build as well as the race technology dash and dta s60 pro ecu. So I took the car to Jdm Dyno to have the ecu fitted and wired in to the engine loom and decided to do my own loom for the car electrics,-and dash. I using the Honda steering wheel and switch gear for all indicators and lighting, but the lighting stalk switches the earth through a relay to avoid arching with a 12v circuit. I made up my own loom from 7 core trailer flex and ran one from the dash to the rear and 2 from the dash to the front and worked my way through each item one at a time before checking it worked and to my amazement every single item worked as it should first time.

Tunnel electrics fitted. Propshaft fitted and wheel speed sensor fitted


I think I am completely finished in the transmission tunnel area now. I have enclosed all the elecrtris in spiral conduit and p-clipped and riveted it at close intervals for a tidy and secure job. The fuel pipes also clipped with rubber edged p-clips to avoid any chafing.
The propshaft was then bolted in position and the wheel speed sensor fit in a position to catch 1 of the 6 bolt heads on the prop as they spin!

Thursday, 28 April 2011

carbon tunnel cover complete.


i have been spending a bit of time trying to make a carbon fibre tunnel cover and have got it done now.

i first bought a 1.2mm alloy sheet,did some drawings,some measuring and some more drawings, unitil i had the measurements i was happy with. i then drew lines on the inside with a marker pen where i wanted to fold the sheet. i then folded the alloy to give it a flat top as i dont like the rounded tunnel tops. i then measured the position of the gearstick and handbrake and began to cut the holes. once this was done i trial fitted it,and once happy i measured up for my carbon and a friend of mine made the c/f to my dimensions. i then stuck the carbon to the alloy with tigerseal and again cut out for the gearstick and handbrake. i then fit my chrome surrounds around the handbrake and gearstick and the end result is nice. i will finish the top edges with a radiused angle.

here is a few pics before and after the chrome surrounds!